How to install Maven on windows
maven
windows
JAVA_HOME
M2_HOME
jdk
jre
install maven windows

It's very simple to install Apache Maven on Windows. All you need is to download the .zip archive, configure Windows path variable and you are ready to go.
Step1 - Download and unzip maven
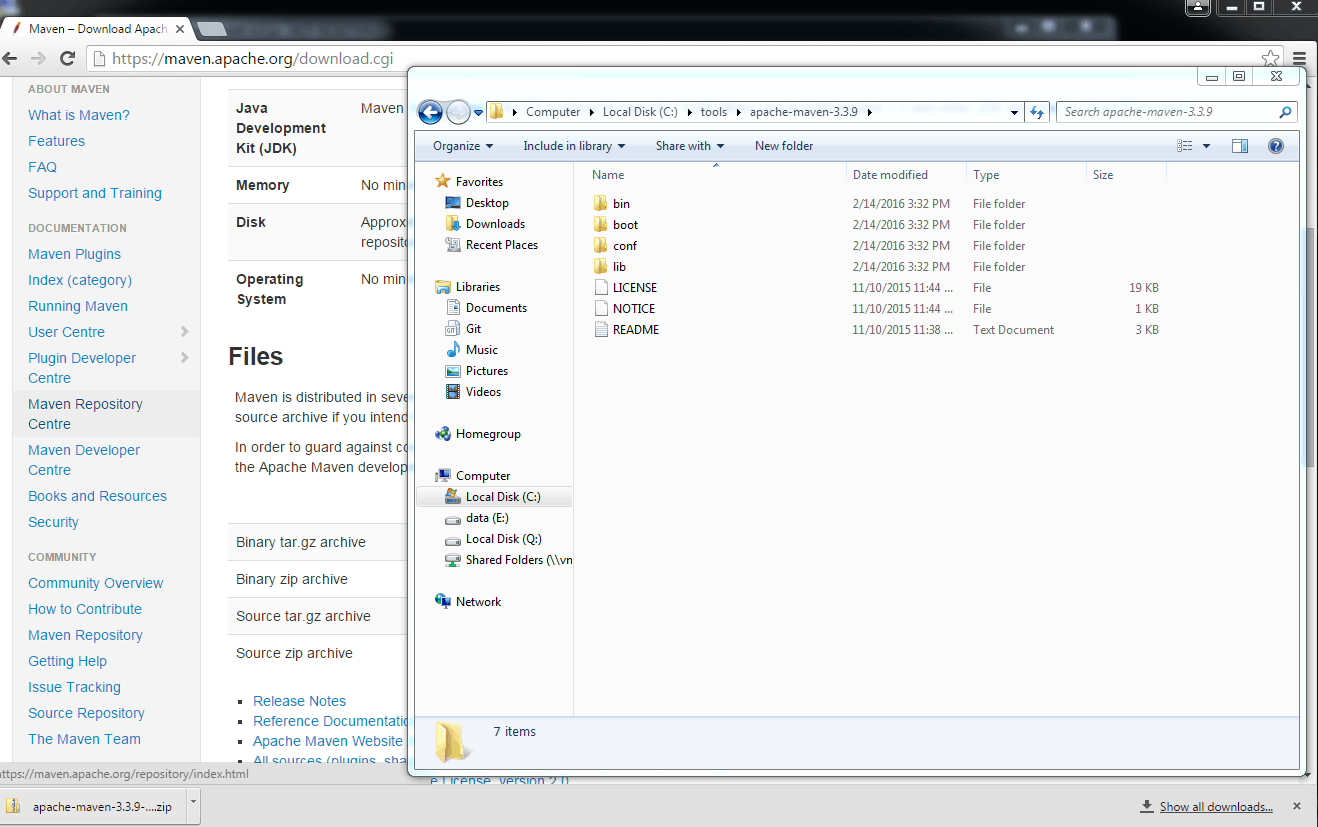
From Apache Maven official download page download the latest version. From Files sections chose 'Binary zip archive' option.
Unzip the archive to a local folder. My location is: c:\tools\apache-maven-3.3.9.
Step2 - Configure Windows variables
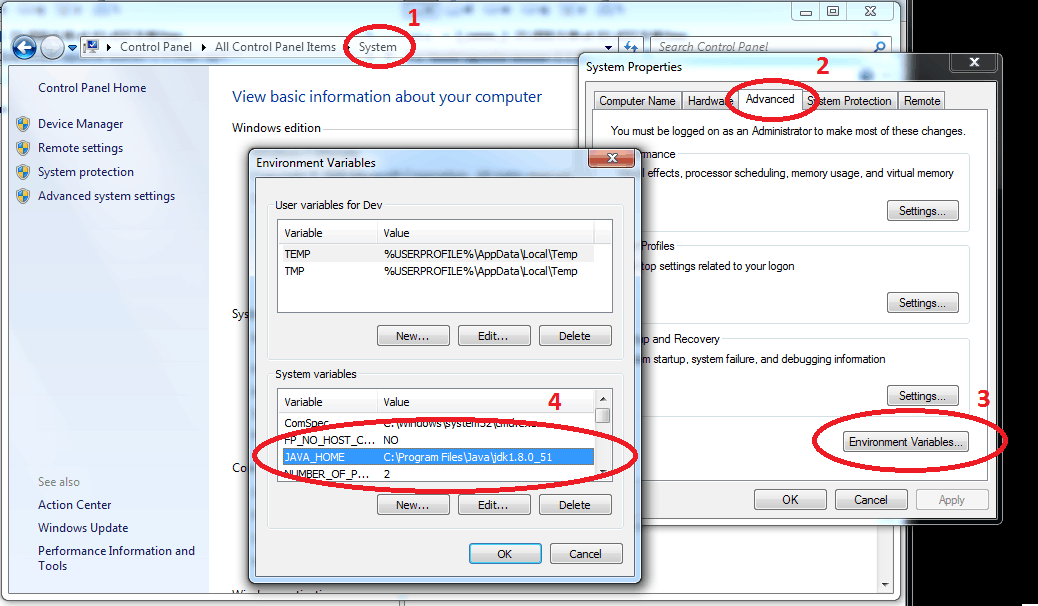
1. Configure JDK and JAVA_HOME variable to Windows environment
If the JDK is not install go to the JAVA download page and get the latest JDK. Start the installer and go through the steps.
After the installation was successfully, from Windows Control Panel open System-->Advanced system settings-->Environment Variables... add th JAVA_HOME variable.
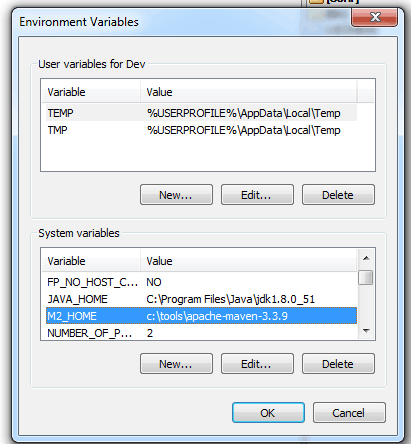
2. Add M2_HOME variable to Windows environment
Next step is to set up the M2_HOME variable to point to your maven folder, in my case: c:\tools\apache-maven-3.3.9
3. Add M2_HOME to the path
In order to Maven accessible on any folder from your computer, you need to add the bin folder to the path. To do this, select the Path variable from System-->Advanced system settings-->Environment Variables...,click Edit... and add at the end: ;%M2_HOME%\bin;
Step3 - Check your configuration
To check if maven was successful installed and configured, from command prompt run command: mvn --version
If you have a similar message it means that you configured successfully maven on your computer.
Note: if the command prompt windows was opened before configuring the environment variables, you need to restart the command prompt windows.


