Robots.txt File in SEO
robots.txt
robots
sitemap

If you have just created and launched your website and registered it on Google Search Console, it is likely that you will not need this type of control right away. The search engines crawler will crawl all your pages, which usually aren't many at first, and that's fine.
Over time, your website slowly gets bigger, and at some point there will be pages or sections of the website that you will not want to appear in the search engines results.
What is the robots.txt file?
A robots.txt file tells search engine crawlers which pages or files the crawler can or can't request from your site.
This is used mainly to avoid overloading your site with requests; it is not a mechanism for keeping a web page out
of Google. To keep a web page out of Google, you should use noindex directives, or to password-protect
your page.
Why is it important?
Most websites don't need a robots.txt file. And this usually applied to small websites.
Mainly, there are three reasons why you would want to have a robots.txt file:
- To block non-public pages: this can be applied to temporary pages, or a login page.
- To maximize the crawl budget: this applied when the website has a lot of pages and not all pages are indexed. By blocking unimportant pages Google can spend more og your crawl budget on more important pages.
- To prevent indexing of resources: this applies when multimedia resources, like PDFs and images needs to be ignored by Google.
Where is the "robots.txt" file?
The robots.txt file is usually available at the root of the website. You will need to use an FTP client to access it or use your cPanel (if your host provider uses cPanel) to manage your files.
This is a regular file just like any other file and you simply have to open it with a text editor. If you can't find the "robots.txt" file at the root of your website, you can always create one. All you have to do is create a text file called "robots.txt" on your computer and send it to the root of your hosting using the FTP client
How to use the "robots.txt" file?
The syntax used for the robots.txt file is very simple. The first line usually lists the agent's name. The agent is the name of the robot you are communicating with. For example, Googlebot "or" BingBot for the Google and Bing robots in question. You can use "*" to give instructions to all robots at the same time.
The next line begins with "allow" or "disallow" (allow or disable) path indexing. This way, the robots will know what to index and what not to index.
Here is an example of a robots.txt file used in a Wordpress installation
User-Agent: *
  Allow: /wp-content/uploads/
  Disallow: /wp-content/plugins/
  Disallow: /readme.html
In this WordPress "robots.txt" file, we gave instructions to the robot, to index the entire media file directory /wp-content/uploads/.
The last two lines prohibit the indexing of the plugin directory and the "readme.html" file.
Check for Errors and Mistakes
It is important that your robots.txt file is setup correctly. One simple mistake and your entire site could get deindexed.
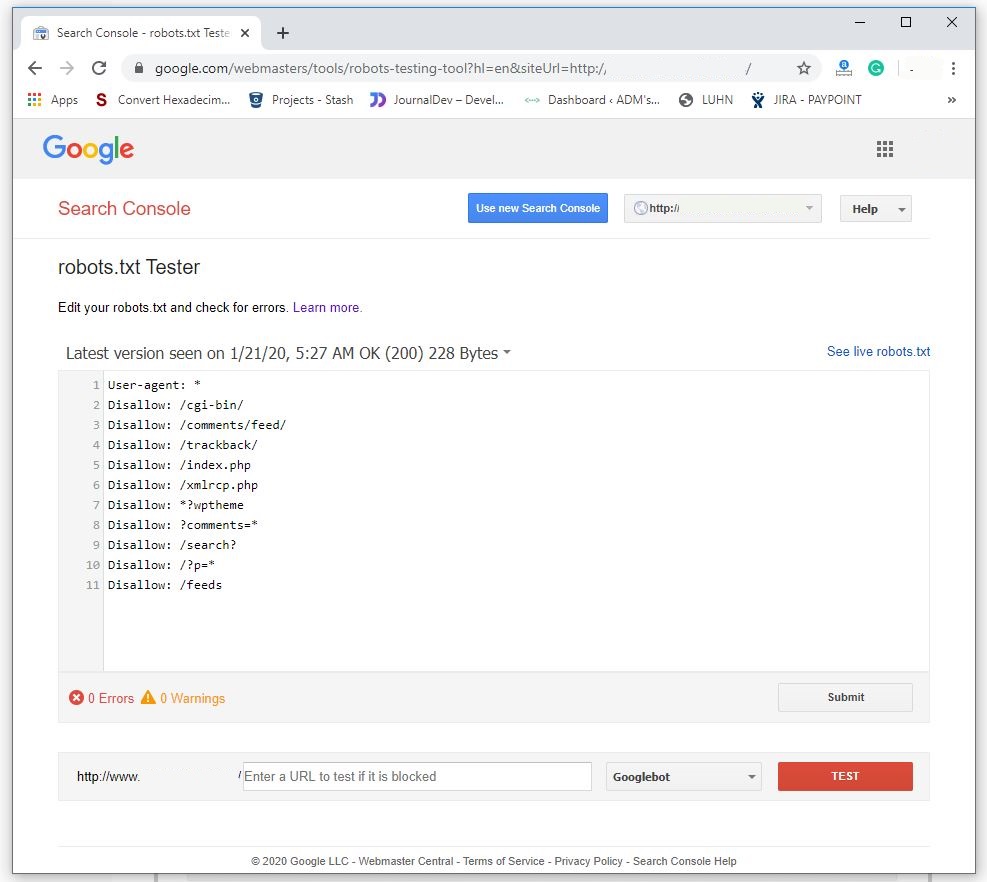
Google has a good Robots Testing Tool that you can use to validate your robots.txt file:
The tool will display the any warning or error in the robots.txt file.
How to add a link to sitemap
Note that this command is only supported by Google, Ask, Bing, and Yahoo.
The sintax is simple and a robots.txt file can have multiple sitemap URLs.
Sitemap: https://www.example.com/page-sitemap.xmlRobots.txt full example
User-Agent: *
  Allow: /wp-content/uploads/
  Disallow: /wp-content/plugins/
  Disallow: /readme.html

  Sitemap: https://www.example.com/page-sitemap1.xml
  Sitemap: https://www.example.com/page-sitemap2.xml
  Sitemap: https://www.example.com/page-sitemap3.xml


