How to prepare a Windows Java Development Machine
development machine
java
maven
MySQL
MongoDB
Eclipse
Netbeans
install
windows

I believe you will find a lot of resources on the web on this topic. This is my Windows 7 set up I am using for all my tutorials from ADMFactory.com.
This post is addressed to people new to Java development, who need setting up their Windows (7 or similar) environment, with all the basic tools and settings, in order to start writing Java code. If you need help with basic commands and tools within Windows OS follow Windows basics commands and tools for developers tutorial.
Prerequisites
A working PC with Windows installed.
For this tutorial, I will use a VM (virtual machine) with 3Gb RAM with Windows 7 x64 installed. I am using a VM because I usually working on Mac OS (my dev Mac setup coming soon...)
Tools to be installed
This is the list of most common tools I used. Not all are needed to be installed, depends on what you want to do.
- JDK (mandatory)
- IDE (mandatory)
- Server
- Tomcat(optional)
- Build tools
- Apache Maven(optional)
- Apache Ant(optional)
- Database
- Database visual tools
- MySQL Workbench(optional)
- Mongo Management Studio(optional)
- Decompiler
- Java Decompiler(optional)
- Testing Tools
- SoapUI(optional)
- Linux SSH/Terminal tools
- Repository tools
- TurtoiseSVN(optional)
- TurtoiseGIT(optional)
Note: I will go always with latest versions. Also make sure you download the proper version for your OS: x86 or x64.
Tip: Instead of installing each software in its own default folder I will use one single folder with all development tools: d:\apps
Just for learning Java are mandatory only the JDK and one IDE (Eclipse or any other).
1. JDK
From download page get the latest JDK. Start the installer and go through the steps.
Configure JAVA_HOME and PATH variables
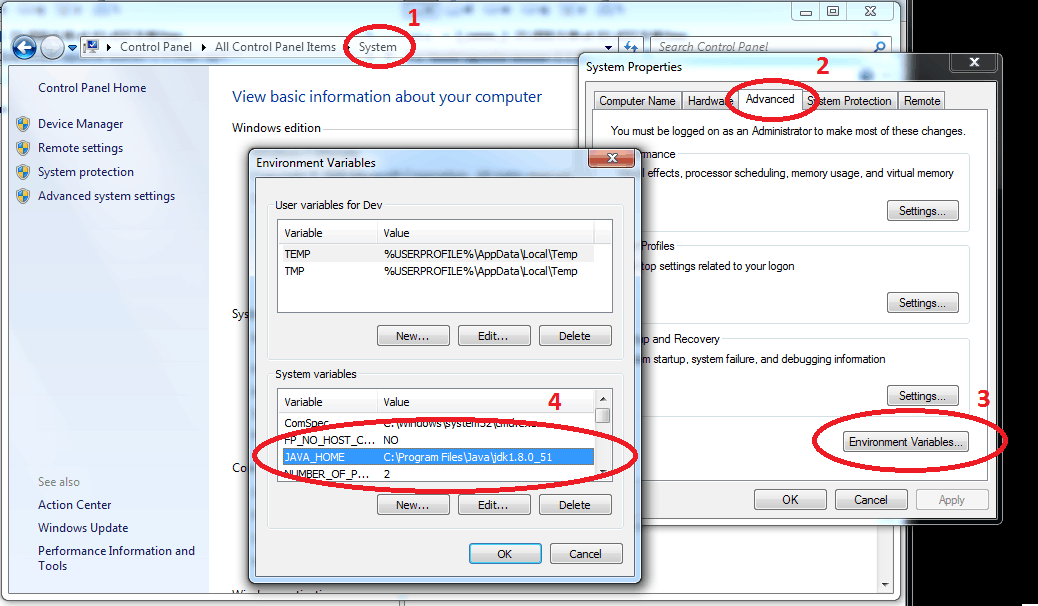
From Windows Control Panel open System -> Advanced system settings add the JAVA_HOME variable to point to your JDK installation folder, our case: d:\apps\jdk1.8.0_74.
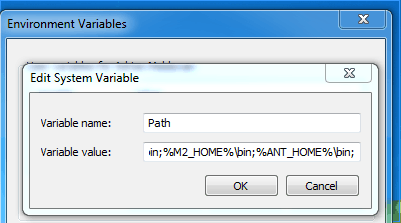
To have access to javac or wsimport commands directly from the command prompt, from Windows Control Panel open System->Advanced System Settings and add %JAVA_HOME%\bin folder to the Path variable.
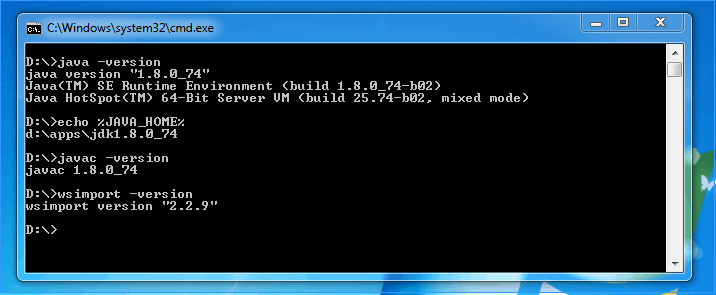
Now after we have installed and set up java, it's time to check if everything was installed properly. To do that we can run the following commands from command prompt.
- java -version: checks if JRE was installed successfully.
- echo %JAVA_HOME%: checks if the JAVA_HOME variable was set up properly.
- javac -version: (optional) checks if JDK bin folder has been successfully added to the path variable.
- wsimport -version: (optional) checks if JDK bin folder has been successfully added to the path variable.
The output for these four commands should look like this:
Congrats you have successfully set up the java run time and the JDK environment!
2. IDE
There are a lot of IDEs for Java, I have chosen two of them: Eclipse and NetBeans and the only reason is that I worked with both.
Eclipse
Eclipse is an integrated development environment (IDE). It contains a base workspace and an extensible plug-in system for customizing the environment. Eclipse is written mostly in Java and its primary use is for developing Java applications, but it may also be used to develop applications in other programming languages. From download page get the latest version of Eclipse IDE for Java EE Developers. Unzip the content to d:\apps\eclipse folder.
Create a new Workspace
Run the eclipse.exe file from eclipse folder and select the workspace folder. I will use the folder d:\workspaces as the root for all my workspaces. To make is easy start in the future create a shortcut on your desktop.
Eclipse workspace was successfully created and is ready to be used.
Congrats you have successfully installed your first IDE. You can start to write awesome java code.
NetBeans
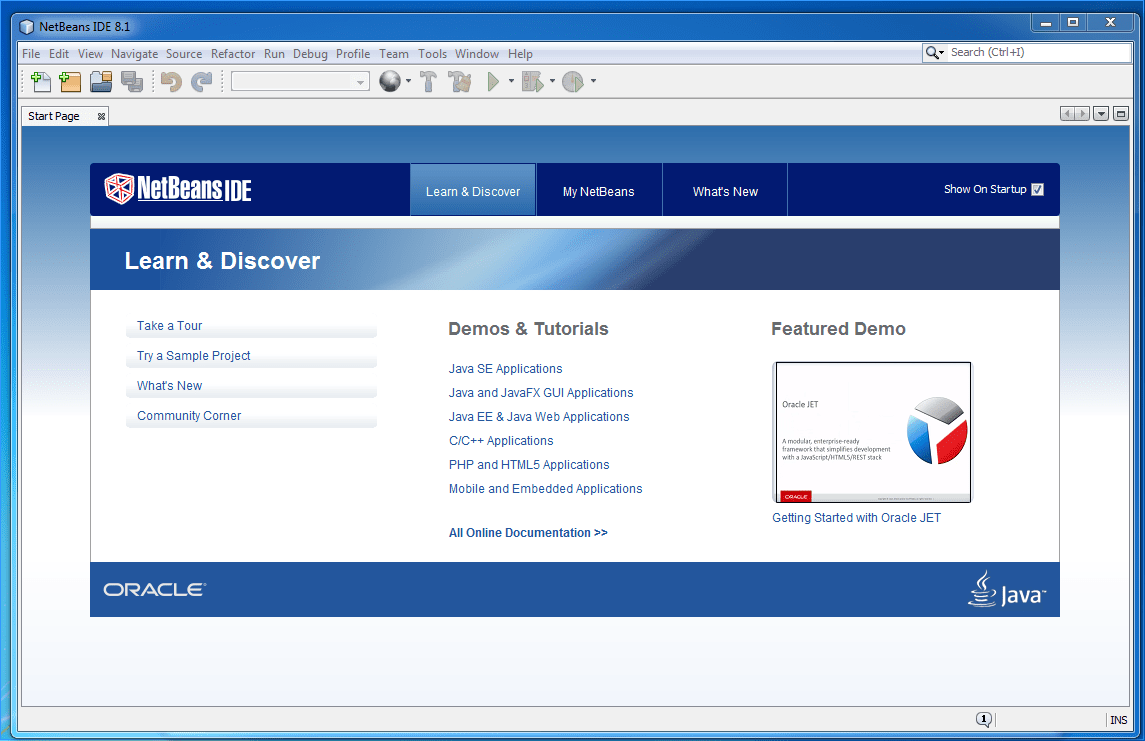
Netbeans is the second option for IDE. From download page select OS Independent Zip as platform and download Java EE version. After that unzip it to our apps folder. Running netbeans.exe from bin folder you will start the IDE.
Congrats you have successfully installed NetBeans.
3. Server
If you want to build Java web applications you definitely you need a Servlet Server and the most common used is Tomcat.
Tomcat
Apache Tomcat is an open source software implementation of the Java Servlet, JavaServer Pages, Java Expression Language and Java WebSocket technologies. From download page get the latest version (zip version) and unzip it to d:\apps\tomcat folder.
4. Build tools
Is good for every project to use a build tool as will add all dependencies automatically and you can compile and run the app directly from command prompt with easy commands.
Apache Maven
Apache Maven is a software project management and comprehension tool. Based on the concept of a project object model (POM), Maven can manage a project's build, reporting and documentation from a central piece of information. From download page get the latest version (zip version) and unzip it to d:\apps\maven folder.
Configure M2_HOME and PATH
From Windows Environmental Variables add M2_HOME variable to point to D:\apps\maven folder.
Also you need to add the bin folder to the path: %M2_HOME%\bin
To check if Maven was installed successfully you can run mvn --version command from command prompt. The result should look like this.
Congrats you have successfully installed Maven. Now we are ready to build projects.
Apache Ant
Apache Ant is an other software tool for automating software build processes. From download page get the latest version (zip version) and unzip it to d:\apps\ant folder.Configure ANT_HOME and PATH
For Ant we are following the same step as for Maven. From windows environmental variables add the ANT_HOME variable.Next add ant bin folder to the path: %ANT_HOME%\bin.
To check if Ant was installed successfully you can run ant -version command from command prompt. The result should look like this.
Congrats you have successfully installed Maven.
5. Databases
Any modern application will have a database. In this sections I added two of them:
- one relational database: MySQL
- the second one NoSQL database: MongoDB
MySQL
MySQL is an open-source relational database management system (RDBMS). From download page get the latest version of MySQL Community Server (zip version) and unzip it to d:\apps\mysql folder.
Configure as service
I recommend to install MySQL as service with startup type Manual and start it only when needed.
To install MySQL as service you need to run command: mysqld --install
If successfully you should obtain an message like this.
Note: if the installation fails you might need to run the command prompt as administrator.
Before start you need to do the following:
- create the data folder on the default location, our case: d:\apps\mysql\data.
- initialize the default database by running the command:
mysqld --initialize --consoleThe output for this should look like this.
D:\apps\mysql\bin>mysqld --initialize --console
2016-03-28T19:34:05.408857Z 0 [Warning] TIMESTAMP with implicit DEFAULT value is deprecated. Please use --explicit_defaults_for_timestamp server option (see documentation for more details).
2016-03-28T19:34:06.410857Z 0 [Warning] InnoDB: New log files created, LSN=45790

2016-03-28T19:34:06.476857Z 0 [Warning] InnoDB: Creating foreign key constraint system tables.
2016-03-28T19:34:06.496857Z 0 [Warning] No existing UUID has been found, so we assume that this is the first time that this server has been started. Generating a new UUID: 0915913b-f51c-11e5-b732-e0f84717f139.
2016-03-28T19:34:06.498857Z 0 [Warning] Gtid table is not ready to be used. Table 'mysql.gtid_executed' cannot be opened.
2016-03-28T19:34:06.504857Z 1 [Note] A temporary password is generated for root@localhost: I5LyaMg4wj&G

D:\apps\mysql\bin>
telnet localhost 3306Alternatively you can try to connect using MySQL Workbench application.
MongoDB
MongoDB (from humongous) is a cross-platform document-oriented database. Classified as a NoSQL database, MongoDB changes the traditional table-based relational database structure in favor of JSON-like documents with dynamic schemas (MongoDB calls the format BSON), making the integration of data in certain types of applications easier and faster. From download page get the latest version.
Install
Following Mysql example I also recommend to install MongoDb as service with startup type Manual and start it only when needed.
To install as service follow these steps:
- add mongodb.cfg file into mongodb bin folder.
systemLog: destination: file path: d:\apps\MongoDB\Server\3.2\data\log\mongod.log storage: dbPath: d:\apps\MongoDB\Server\3.2\data\db\ - create folder d:\apps\MongoDB\Server\3.2\data\log and d:\apps\MongoDB\Server\3.2\data\db
- from bin folder run the command
D:\apps\MongoDB\Server\3.2\bin>mongod --config d:\apps\MongoDB\Server\3.2\bin\mongod.cfg --install
...and we are ready to go. From Windows services you can start the MongoDB service. To test it you can run the telnet command on mongodb port 27017
telnet localhost 27017Alternatively you can try to connect using Mongo Management Studio application.
6. Database visual tools
MySQL Workbench
MySQL Workbench is a unified visual tool for database architects, developers, and DBAs. MySQL Workbench provides data modeling, SQL development, and comprehensive administration tools for server configuration, user administration, backup, and much more. MySQL Workbench is available on Windows, Linux and Mac OS X. From download page get the latest version (zip version) and unzip it to the d:\apps\MySQLWorkbench folder.
Mongo Management Studio
Mongo Management Studio is a simple and flexible software for creating, editing and managing MongoDB databases with an elegant GUI. From download page get the latest version (community edition) and install it to the d:\apps\MMS folder.
7. Decompiler
Java Decompiler
The Java Decompiler aims to develop tools in order to decompile and analyze Java 5 "bytecode" and the later versions. From JD page download jd-gui-windows 1.4.0 and unzip it to the d:\apps\jd-gui folder.
8. Testing Tools
In this section I will add only SoapUI for now. More to come...
SoapUI
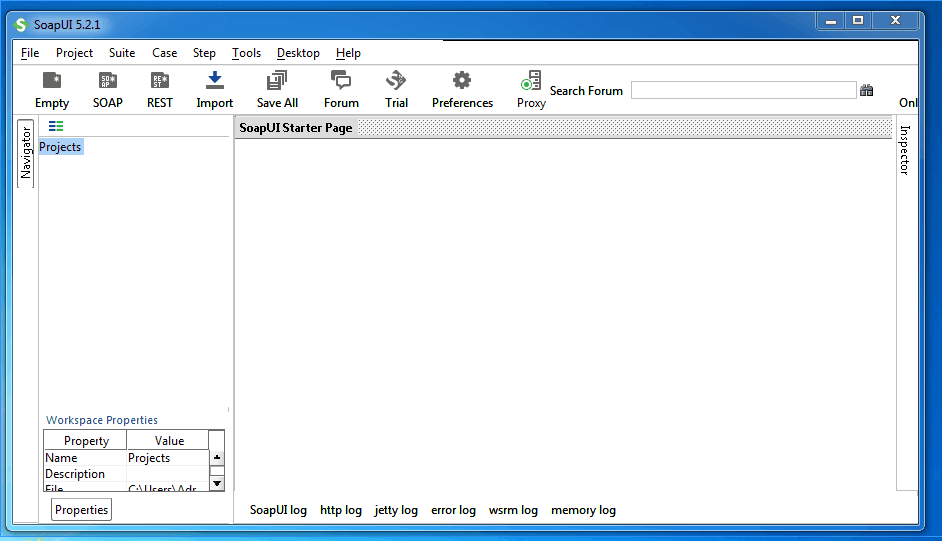
SoapUI is the world's leading Open Source Functional Testing Tool, mainly it is used for API Testing. SoapUI supports multiple protocols such as SOAP, REST, HTTP, JMS, AMF and JDBC.SoapUI enables you to create advanced Performance Tests very quickly and run Automated Functional Tests. From download page download windows zip version and unzip it to the D:\apps\soapui folder. To start SoapUI you need to execute soapui.bat file from bin folder.
9. Linux SSH/Terminal tools
Contains tools to connect to linux console (putty) or used to upload files to linux servers (WinSCP).
WinSCP
WinSCP is an open source free SFTP client and FTP client for Windows. Its main function is the secure file transfer between local and remote computer. From download page get the latest version (portable executables) and unzip it to the d:\apps\winscp folder.
Putty
PuTTY is a free and open-source terminal emulator, serial console and network file transfer application. It supports several network protocols, including SCP, SSH, Telnet, rlogin, and raw socket connection. It can also connect to a serial port. From download page download putty.zip file and unzip it in d:\apps\putty folder.
10. Repository tools
Version control is a system that records changes to a file or set of files over time so that you can recall specific versions later.
During my programing experience I used two systems: SVN and GIT.
For both usually I added a windows client as shell extension.
TortoiseSVN
TortoiseSVN is an Apache Subversion (SVN) client, implemented as a Windows shell extension.
Install
From download page get the latest version according with your system, x86 or x64, and install it following the instructions. As destination folder chose d:\apps\TortoiseSVN.
To check if was installed successfully right click on a folder: the TortoiseSVN menu should appear.
TortoiseGIT
TortoiseGIT is a GIT client, implemented also as a Windows shell extension.
Install
From download page get the latest version according with your system, x86 or x64, and install it following the instructions. As destination folder chose d:\apps\TortoiseGIT.
Additional for TortoiseGIT is needed to be installed git. To do that download GIT and install it.
To check if was installed successfully right click on a folder: the TortoiseSVN menu should appear.
Note: Both TortoiseSVN and TortoiseGIT are using overlay icons to show the state of files, but if doesn't appear for you, don't worry, it might be because you have too many applications that are using overlay icons and Windows have a limit of maximum 15 overlay icons.
Conclusions
These tools I am usually using on my development process. I don't say are the best options, is just that I am used with these.
If your PC is not powerful enough try to install only the minimum and start only the needed servers.
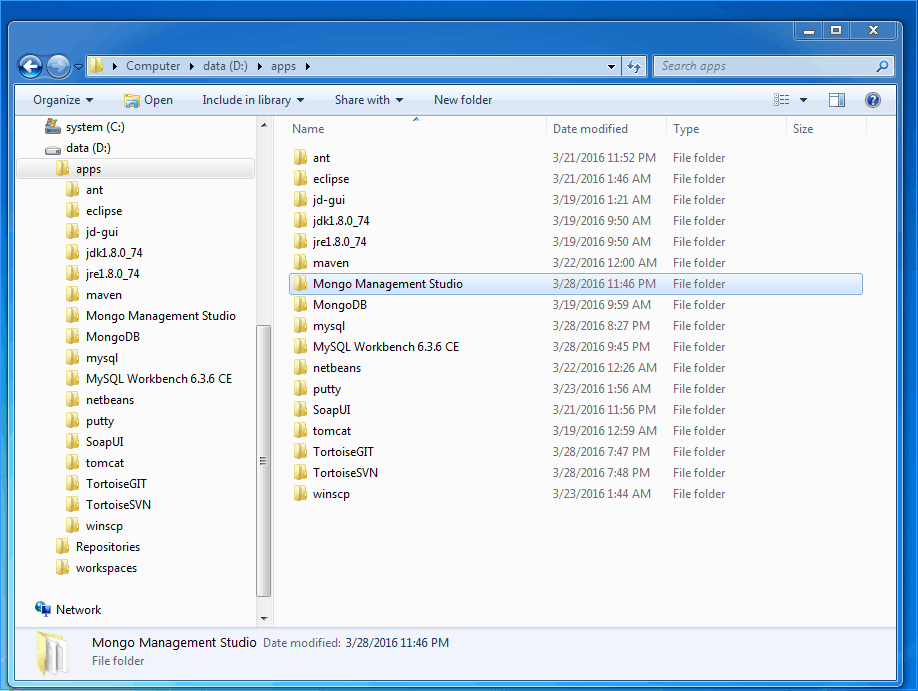
After all the applications installed my apps folder looks like:
Now is time to do amazing things! Good luck!
Any comments or suggestions are welcome.
