How to import and export Java Projects in Eclipse
import
export
java project
Eclipse

In this article will present how to import and export Java Project to/from Eclipse.
Import
To import an entire Eclipse project from an archive file or a folder, follow these steps.
Step1
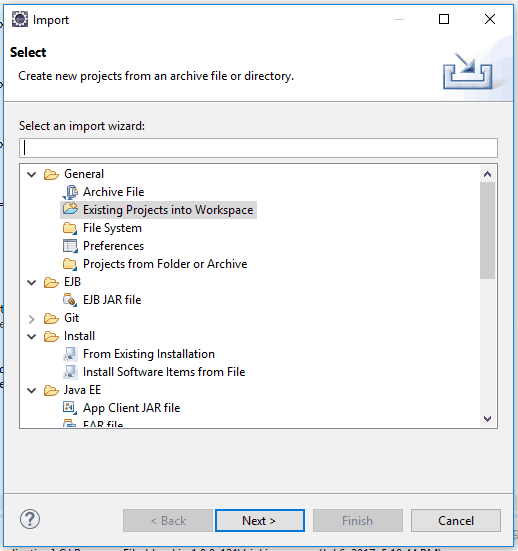
Go to File -> Import... The following dialog will appear.
Step2
Select Existing Projects into Workspace. You can also use the search text box to find easier the wanted option.
Step3
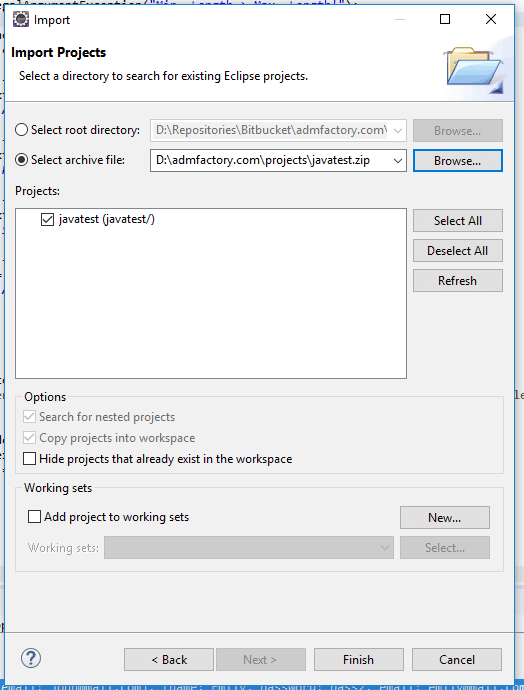
If you import the project from archive click the Select archive file and click the Browse button on the following dialog. If you import the project from a folder click the Select root directory and click the Browse button on the following dialog.
Find the archive file or the folder on your hard disk. Click Open to select it.
Step4
In the Projects list, the project should be already selected. Click Finish to import the project into Eclipse.
Congratulations, the project should now appear in your Project Explorer view!
Export
To export an entire Eclipse project into an archive file, follow these steps.
Step1
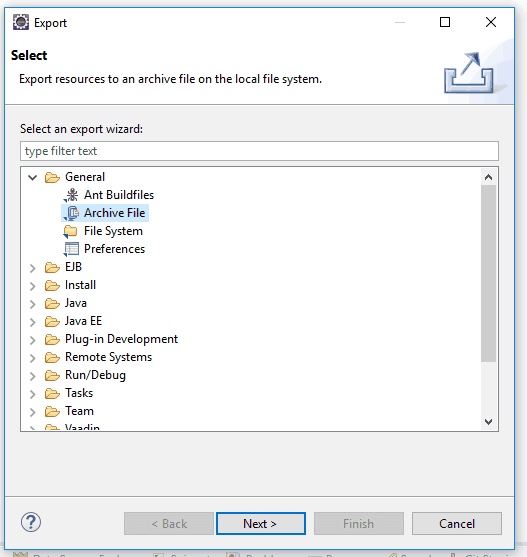
Go to File -> Export... The following dialog will appear.
Step2
Select Archive File in the list presented in the figure above and click Next. You can also use the search text box to find easier the wanted option.
Step3
The following window will appear. Click the checkbox next to the project you would like to export. From Options section, you can choose the archive format and other project related options.
Step 4
In the window above, click Finish. Eclipse will export and archive your project into an archive file and store it in the location you specified.


