Configure database connection in Eclipse
eclipse database
eclipse database connection
eclipse mysql connection

The Eclipse Data Tools Platform (DTP) provides tools to connect and do database operations.
In this tutorial I used:
- Eclipse (for Java EE Developers)
- MariaDB 5.5
- MySQL Java Connector version 5.1.39
You can do this very easy by following the next steps.
Step1
From File-->New-->Other... select Connection Profiles and click Next.
Step2
From the next wizard window, select your database type, in my case MySQL.
Step3
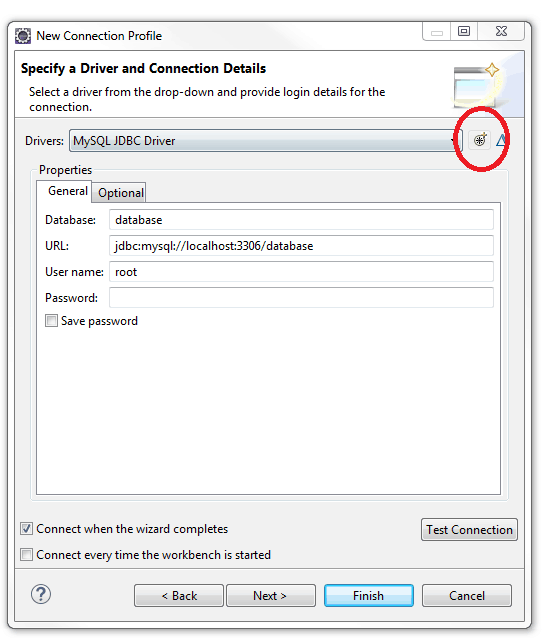
Before being able to connect to the database we need to configure a database driver. To do this click the New Driver Definition button (+).
Select the database driver type and type a driver name - I will use the driver version as suffix.
Then switch to JAR List tab and add the mysql-connector-java. If you don't have it already locally, download from MySQL web page, unzip it and attach the jar file as shown in the picture bellow.
Press Ok and jump to the next step.
Step4
Fill all the database details:
- database name;
- database URL;
- username and password. (you can choose to save the password by clicking the Save password checkbox)
Once you have done this, you can test the connection by clicking the Test Connection button. If you see the Ping succeeded! message, press Finish and we are ready to go.
Note: if you need the connection all the time you can select "Connect every time the workbench is started".
Step5
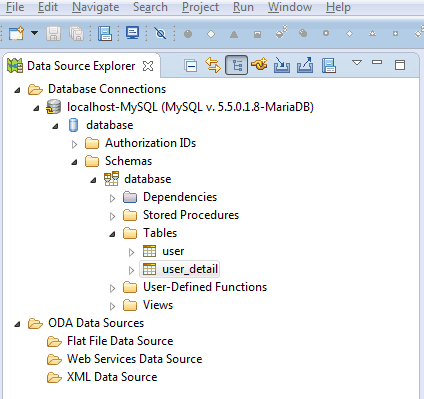
To see the database, switch to Database Development perspective and in the Data Source Explorer view you can see the connection and the content to your database.


